typographic portrait
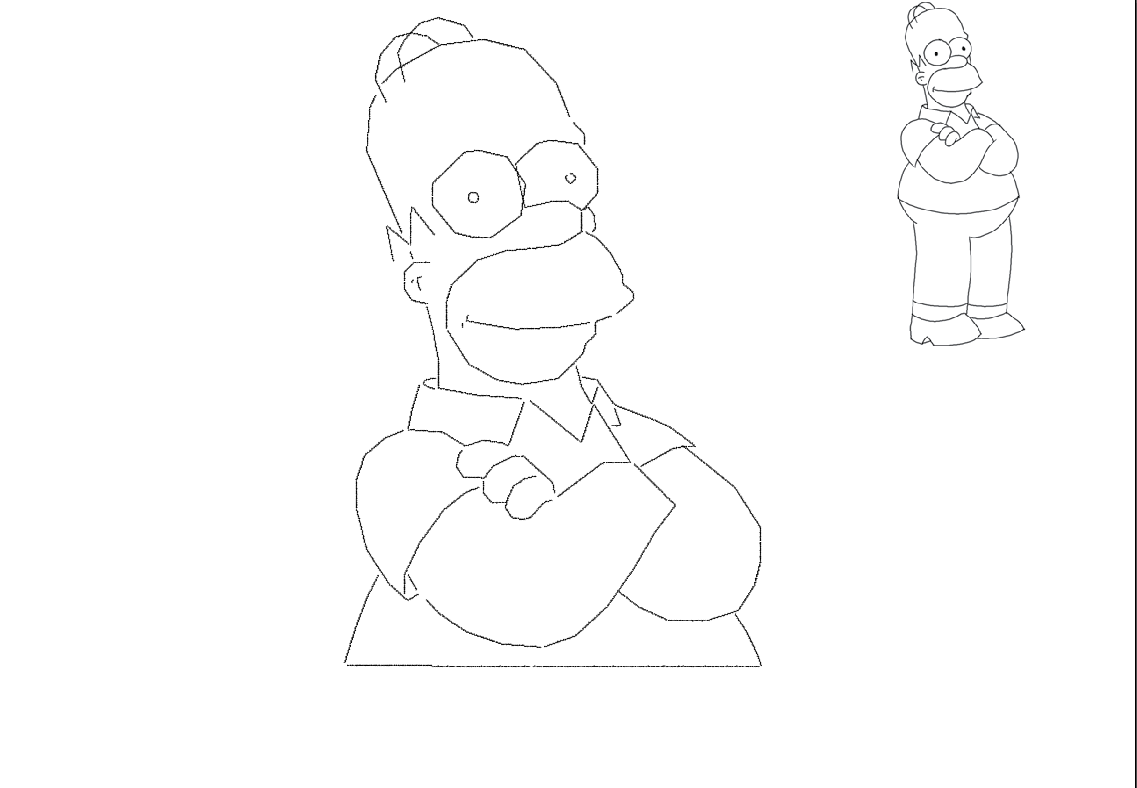
For this I chose a picture of homer from the Simpsons and then I made him with words. The words are small because I had to make them smaller so there were no spaces in the words. I used the pen tool to trace the picture then I used the type on a path and it wrote it on the path I traced.
skylab
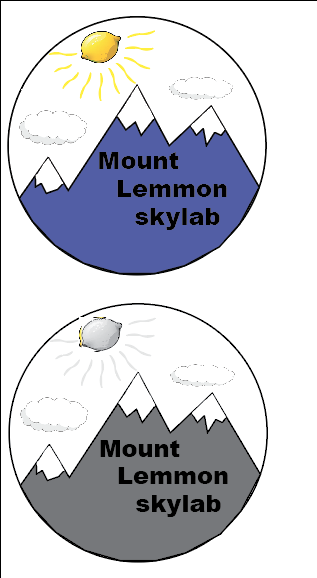
For this I went onto illustrator and I made my own design. I gave it some color and a way to symbolize it is for mount Lemmon. Then I converted it to a greyscale. Finally I pu them on the same page so they can be compared.
skylab shirts
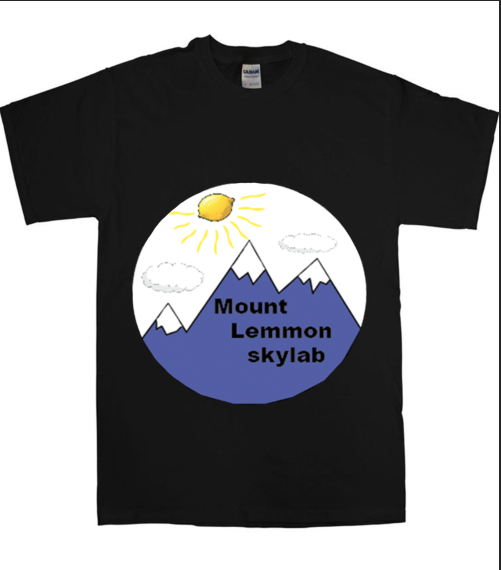
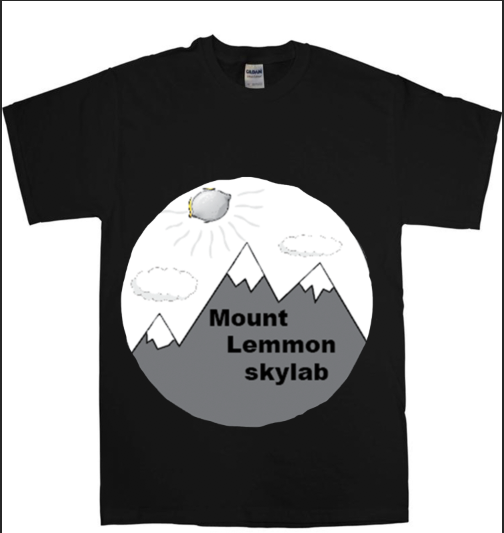
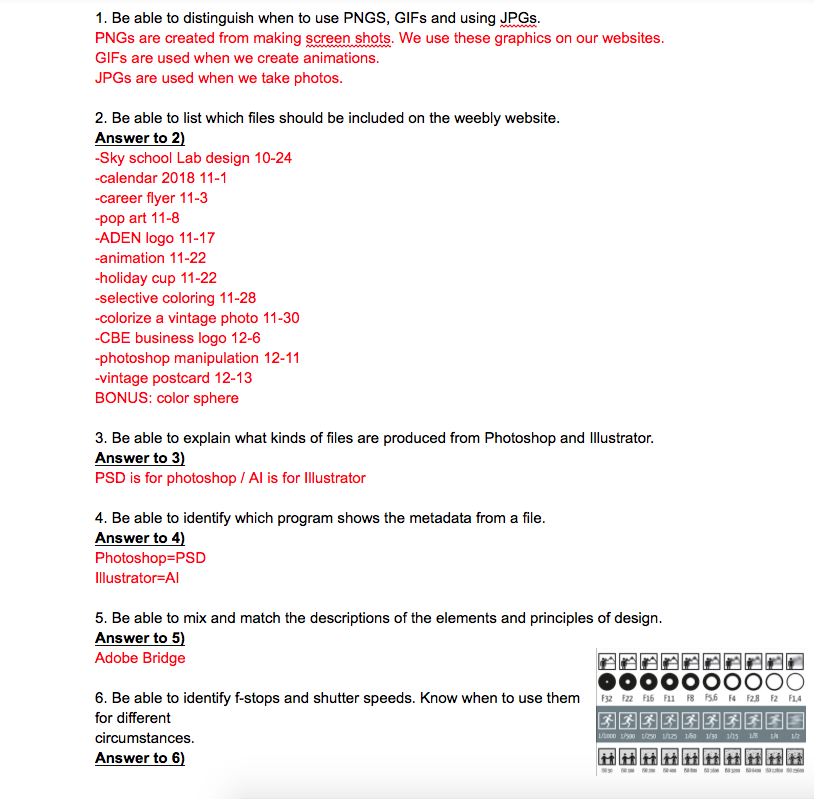
For these shirts I went onto photoshop and I put my logo on the shirt. Then I erased the white part of the design. Then I made sure It looked nice and made sure it was in the center of the shirt. Finally I made sure one of them were black and white and turned it in.
calendar
For this I went onto illustrator and I made my own calendar. I have 4 different colors and also I have 2 different fonts. My calendar also has a certain theme which is cities. Then I made sure the calendars looked like and made sure they looked nice.
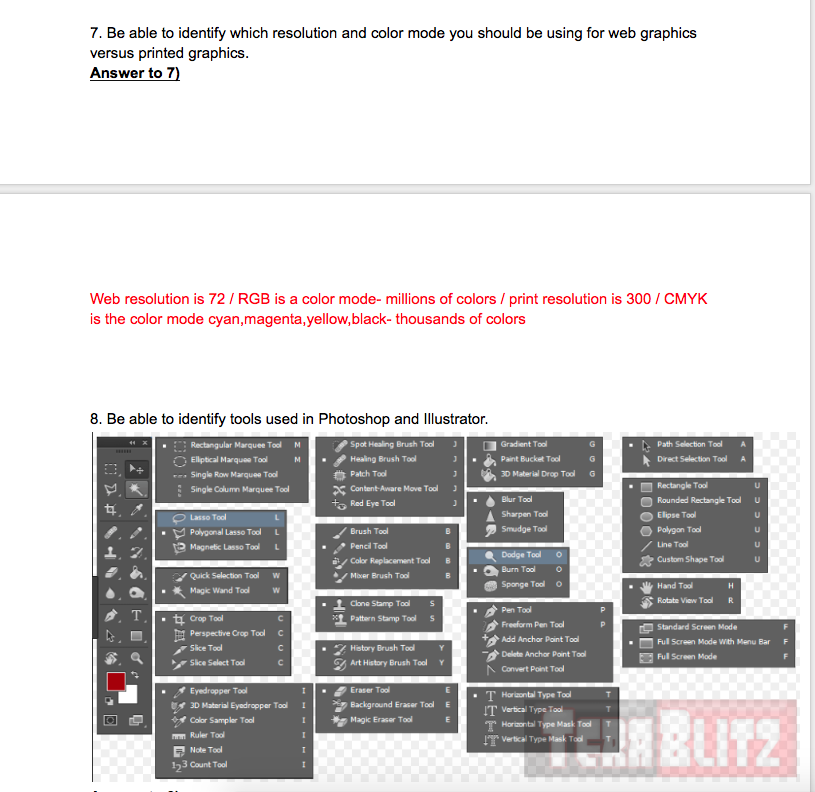
career flyer
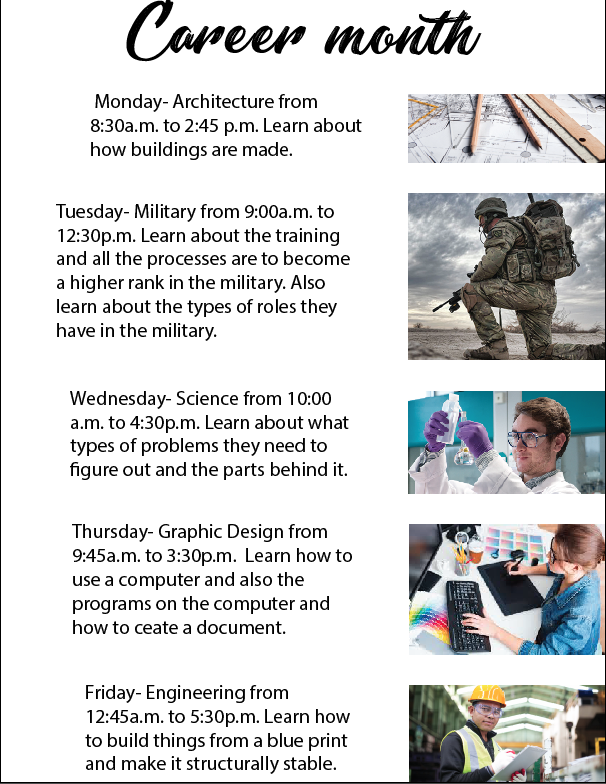
For this I went onto illustrator and I took 5 pictures of a building or a diagram of one. Then I wrote what is important about them. Also I stated if they are built wrong that could be bad because then it can collapse. They have to go through different steps like make the diagram and then look at the 3d finished product an then make it.
pop art
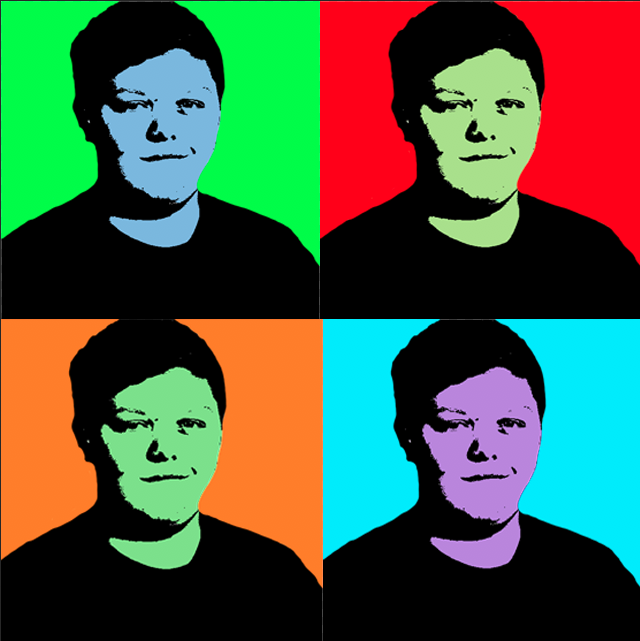
For this I took a picture of myself and then I made it green and blue. Then I pasted it and moved it over and changed the color. I kept on doing this and I made all the pictures a different color. Then I made sure they were close together and no separations.
ADEn logo
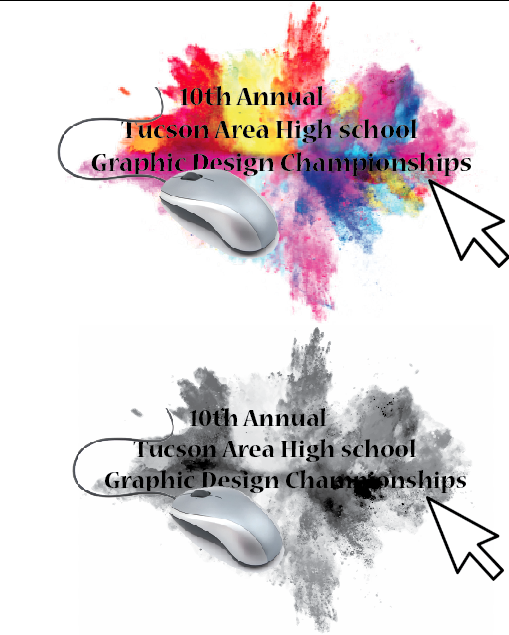
For this I took multiple pictures and then I combined them. I wrote the name and the year of the contest. Then I put the color in the back and I added more computer related pictures. I made it look like the mouse is going around the text and the pointer is clicking on theme. then finally I converted it to a greyscale.
animation
I went onto photoshop and I made the background a pixel base. Then I made my character and made it a timeline on photoshop. Then I moved around my character and made hime look like he was jumping. He looked like he was jumping around the screen.
holiday cup
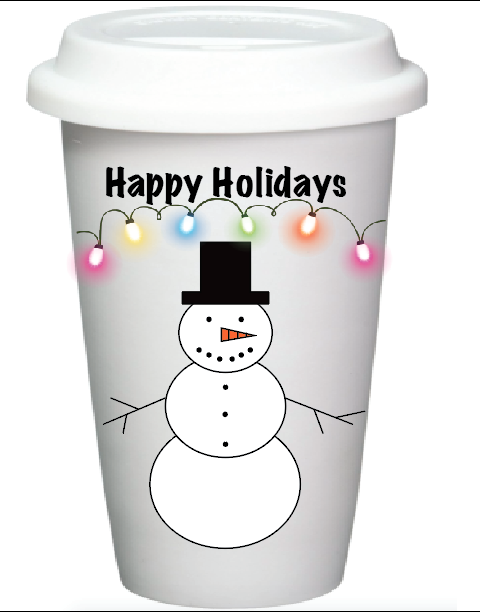
For this I went onto illustrator and then I copied the cup. Then I made the snowman and put him on the cup. Then I made the snowman fit the cup. Then finally I wrote happy holidays on the cup so people who have bought the cup they would have a good day.
selective coloring
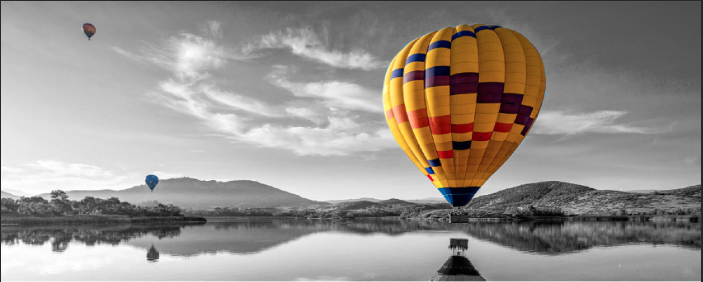
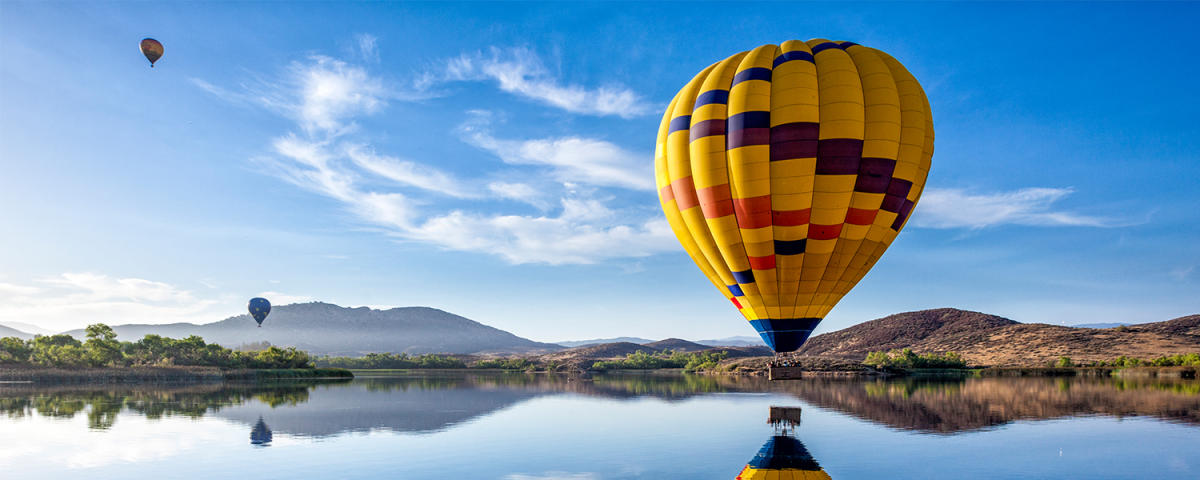
For this I took a picture off of google and I made sure it had good colors. Then I made it black and white and then I erased the black on the the balloons. Then I made sure it was not colored on another part. Then I cleaned it up and made sure there was not color where I didn't want it.
vintage photo
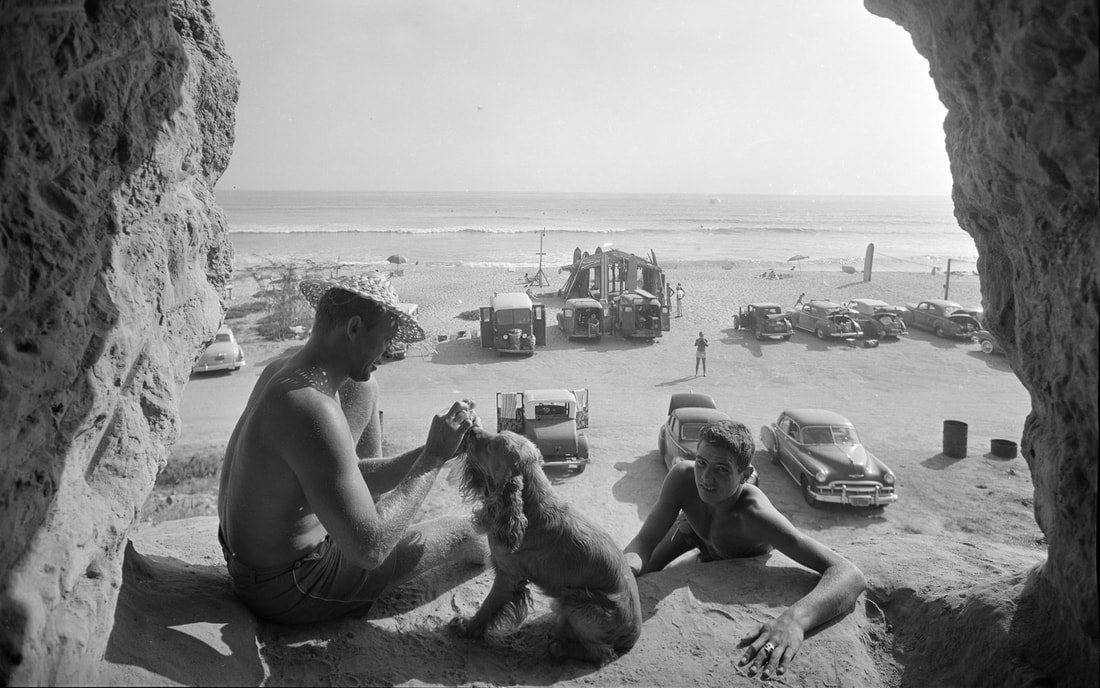
For this I went onto google to find an old picture that was all black and white. Then I cut out part of the picture and selected it so I could change the picture. Then I put in the color I wanted and made it an overlay. Then I made sure the color was only on the water and the sky and everything else what black and white.
cbe business logo

Fro this project I went onto daft and downloaded a basic bold font. Then I went onto illustrator and made the the logo in black and white. then I group the whole picture together so I could move it easier. Then finally I switched the colors to blue and a light green.
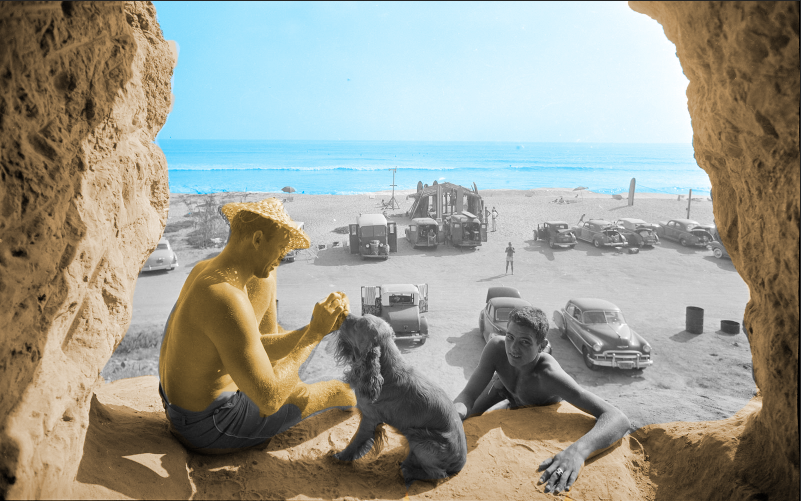
vintage postcard
For this there was a lot of steps to follow. We had to be on illustrator and also photoshop. Then we had to write out a name of a place and make it look old. Then we put it on edmodo with a background.
angel
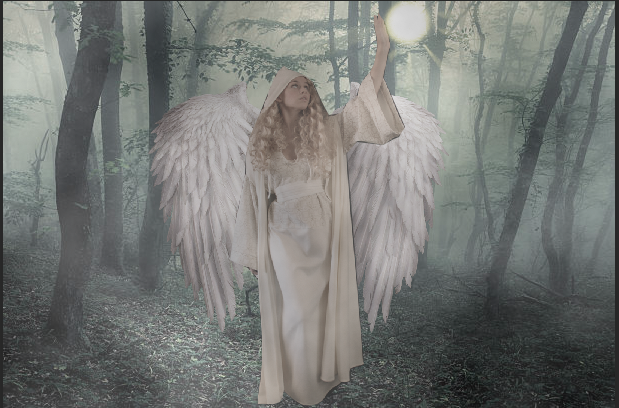
For this I followed the tutorial on edmodo. I made sure I filled every step and made sure I did them right. with the cloud design I went filter render and then clouds and made the opacity to 45 so you could see the girl. Then I made a white spot and made it yellow and blurred it to look like the sun.